Windows 10 System Hardening Lab
Disclaimer: The enclosed PowerShell script and executable file will introduce vulnerabilities to a system upon execution for training purposes. Do not run this outside of a virtual environment.
Requirements:
- Windows 10 virtual machine (VM) with network connectivity
- System Hardening PowerShell script archive
Lab Setup:
This lab provides you with a program to run to make a virtual machine vulnerable. Do not run this outside of your virtual machine. This will make the VM susceptible to attack.
When working with the provided script, warnings can be expected from a host machine with anti-malware programs installed. These provided resources deal with the same remote access tools that are often leveraged by threat actors with malicious intent.
Before powering up the VM, take a snapshot of your virtual machine if possible. This will allow you to revert it to a clean slate after completing the lab, allowing you to reuse the same machine after this lab.
Custom Lab Configuration
For this lab, customization is an option for presenting alternate environments from the one pre-configured in system-hardening.ps1.
Set-LocalSecurityPolicy.psm1 has been provided to automate the process of making custom local security policy configurations for easy modification of the provided script. To use a custom local security policy, run the following PowerShell commands on a Virtual Machine from the directory where Set-LocalSecurityPolicy.psm1 has been downloaded:
Import-Module .\Set-LocalSecurityPolicy.psm1
Set-LocalSecurityPolicy
This will output the file base64-encoded-policy.txt to a specified location. Open this file and pull out the value of the variable $EncodedSecpol. This value can replace the default $secpolicy variable located in system-hardening.ps1 to configure custom security policies.
Windows 10 Setup:
This lab requires a Windows 10 workstation virtual machine.
PowerShell Script Steps:
Extract the lab archive inside your Windows VM. This can either be done by downloading the file inside the Virtual Machine or using VMware tools or VirtualBox shared folders to move files between your host and virtual machine.
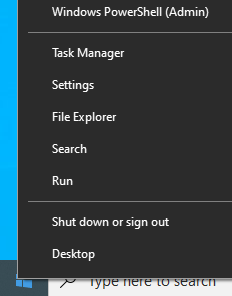
Open PowerShell as an administrator. This can be done by right clicking on the Windows icon in the bottom left corner and clicking Windows PowerShell (Admin):
Disable Windows Defender and set the execution policy to allow the script to run:

Change directories to the folder containing the PowerShell script and associated resource scripts. This will vary depending on the location of the file and the username on the Virtual Machine. Run it with the dot-backslash command:

Note: This PowerShell script is not intended to be reverse engineered to find vulnerabilities on the system, but rather emulate an authentic vulnerable environment that was caused by other means. This script can be removed from the virtual machine after running to completion.
User Accounts
For this lab, this workstation belongs to one user:
- Zuko - Local Administrator
- Username:
zuko - Password:
R0cks!
- Username:
- Katara - Local User
- Username:
katara - Password:
W@ter
- Username:
In this environment, Zuko is a local administrator. This lab will focus on auditing local security policies on the host to harden system security.
Background
System hardening is one important step in keeping attackers out of a system and protecting data. On Microsoft Windows, hardening can be done with a few great Graphical User Interface (GUI) tools that can be extended to larger environments. Many settings and configurations that are discussed in this lab can be extended into a larger Active Directory environment and applied to many machines at the same time.
Local Security Policy
Using Zuko’s account listed above, login to the VM and open up Local Security Policy Editor. A link to this program has been created on the desktop. This can be found by searching by name within the Windows task bar.
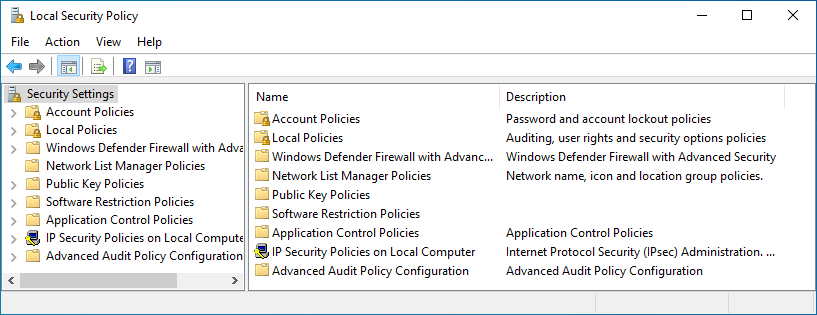
Within the policy manager, settings are categorized into different types of settings. Various settings within these categories will be modified to improve the system’s overall security posture.
Local Password Policies
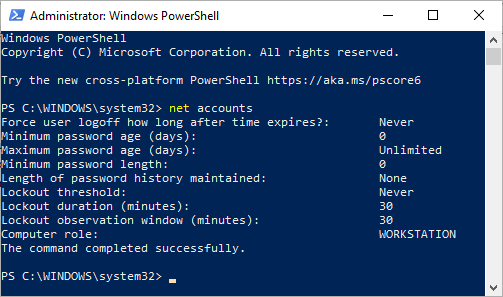
While administrators can check policies within the machine’s GUI using
the Local Security Policy editor tool shown above, the command line can
be used to identify basic settings even more quickly. This can be useful
in Windows Server Core installations where no GUI is available, or on
remote machines that are accessed over SSH or PowerShell Remoting. From
an administrator PowerShell or Command Prompt session, run the net accounts command to view basic password policies on the local machine:
Within the Local Security Policy editor, Underneath Security Settings, expand Account Policies and click on Password Policy:
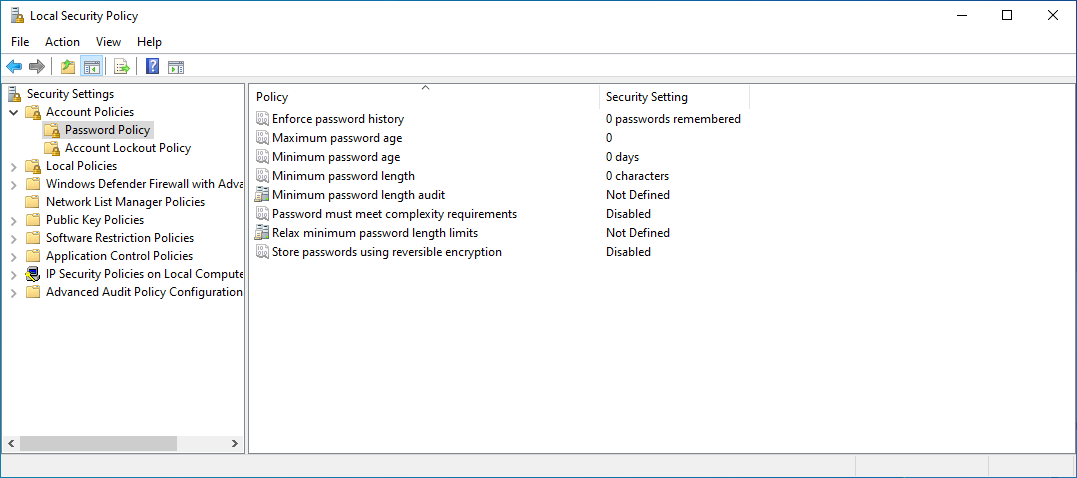
This pane contains some basic password policies on the local system and
mirrors a lot of information observed in the net accounts output
previously shown. On any of the policies displayed within rows in Local
Security Policy, a more detailed description with additional context can
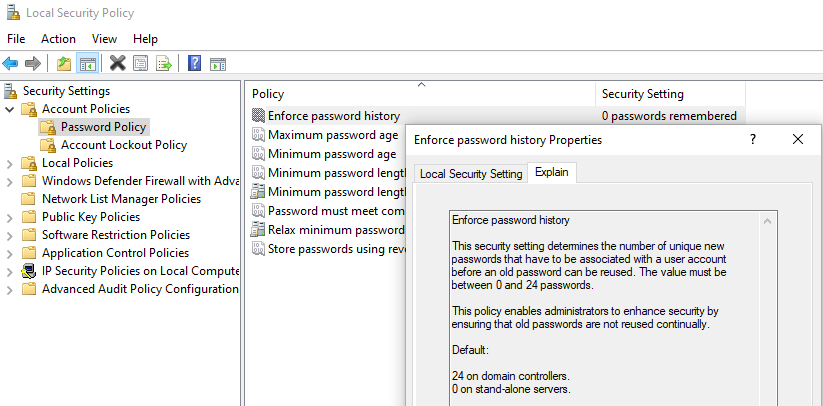
be found by double-clicking on each item and going to the Explain tab:
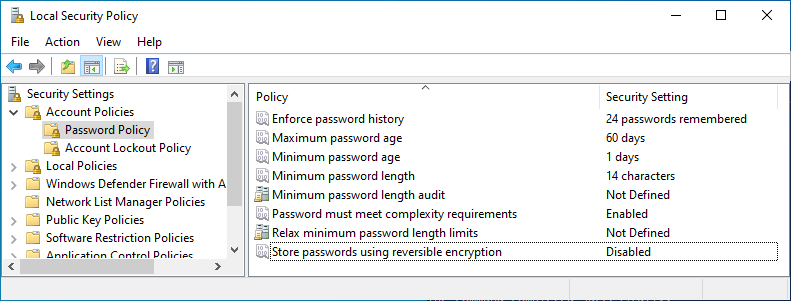
The various settings here will likely need to be tailored to fit a specific organization’s policies. The following settings with accompanying rationales are explained below using the CIS (Center for Internet Security) benchmarks for Windows 10 version 1709. Updated guidelines can be found for various versions of Windows on the CIS website.
- Enforce password history - 24 passwords remembered
- forces users to keep using unique passwords when changed
- Maximum password age - 60 days (or less)
- The longer a password is in use, the higher the risk of compromise by a brute force attack
- Minimum password age - 1 day (or more)
- If a password’s minimum age is set to 0 days, the user can reset their own password many times in a short period of time and use the same password
- Minimum password length - 14 characters (or more)
- A longer password is more difficult to guess in a dictionary or brute force attack
- Password must meet complexity requirements - Enabled
- Passwords become more difficult to guess in an attack when more than just alphanumeric characters are used
- Store passwords using reversible encryption - Disabled
- Password storage should be stored in a way that makes them less susceptible to compromise
After modifying local password policies to meet CIS recommendations, the Local Security Policy editor should look like this:
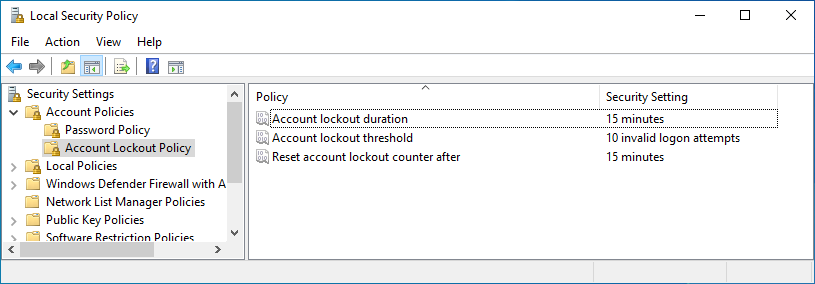
Account Lockout Policy
Under the following tab, click on Account Lockout Policy. The following recommendations are again using CIS benchmarks:
- Account lockout duration - 15 minutes (or more)
- Prevents an attacker attempting to brute force passwords to an account
- The following lockout settings will need to be enabled before duration settings can be set
- Account lockout threshold - 10 invalid logon attempts (or less but greater than 0)
- Prevents an attacker attempting to brute force passwords to an account
- Reset account lockout counter after - 15 minutes (or more)
- Helps a user gain access to their own machine after accidental self-lockouts
After successfully applying these settings, this pane should look like the following:
Local Audit Policy
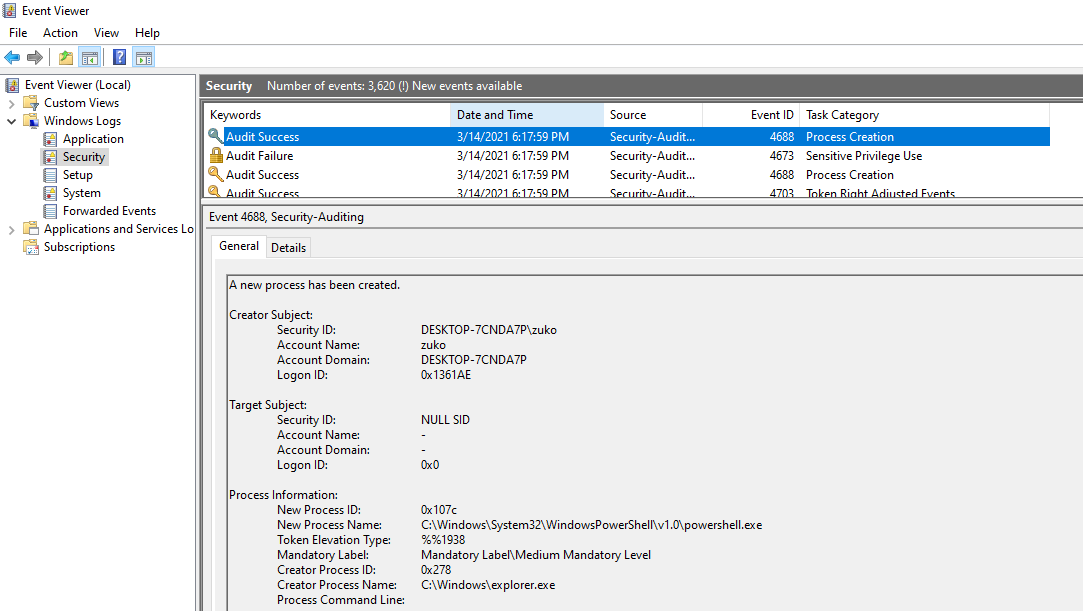
Underneath Local Policies -> Audit Policy, security policies can be configured to audit certain events. In Windows, system audits often mean logging. While there are no recommendations made from CIS on these settings, enabling auditing on events can help provide context around potential security incidents. View the Explain tab on each setting to familiarize yourself with information that each setting can provide.
Check Success and Failure on each setting to provide the most context on events. Now, open a PowerShell window on the VM. Within the Windows Event Viewer, process creation events will now be shown in the Security log. Under the Task Category Process Creation, the Security log should show the created PowerShell process:
Local User Rights Assignment Policy
This policy contains settings related to user rights. This can be useful in reducing the attack surface of a machine and preventing access to unneeded services.
- Access this computer from the network - none
- As this is a local machine that is not accessed remotely or by other users, this setting can be disabled so no users can access it over a network. This will likely vary in a business where machines are managed remotely.
- Allow logon locally - remove “Guest”
- The Guest account is a built-in feature to Windows that can leave a system insecure, as it allows anyone access to the local machine. In this use case, the Guest account is not needed.
- Allow log on through Remote Desktop Services - remove all
- As a single machine that isn’t accessed remotely, there is no need for Zuko to access this computer using Remote Desktop Services. All users can be removed from this setting.
Be cautious about modifying other settings in this pane, as some built-in operating system features may be interrupted by misconfigurations.
Local Security Options Policy
This policy contains a wide array of settings that can help increase security posture in various areas of the Operating System. Be cautious when reading each policy, as phrases often contain double negatives. The following settings can aid in further hardening Windows 10:
- Accounts: Rename administrator account
- This can help stop an attacker from guessing default passwords. By making the default Administrator account named to something different but memorable, an attacker may be stopped from running automated tools and slowed down.
- Accounts: Rename guest account
- In addition to being disabled from previous settings, this can help throw off an attacker by using non-default account names.
- Interactive logon: Display user information when the session is locked - Do not display user information
- Not displaying user information can be useful in preventing attackers from gathering information on a physical machine. If an attacker walks by a locked machine, not displaying basic account information can help protect against the initial stages of an attack.
- Interactive logon: Do not require CTRL+ALT+DEL - Disabled
- Forcing the use of CTRL+ALT+DEL can help a user ensure that they are legitimately logging in when they type their credentials into their computer. This can help protect against phishing attacks, as a user will always need to use this combination of keys before logging on.
- Interactive logon: Don’t display last signed-in - Enabled
- Similar to previous settings, this can help stop an attacker that has physical access to a target machine by not displaying user information.
- Interactive logon: Don’t display username at sign-in - Enabled
- Similar to previous settings, this can help stop an attacker that has physical access to a target machine by not displaying user information.
- Interactive logon: Machine inactivity limit - 900 seconds (or less)
- This setting will automatically lock a machine after 15 minutes of inactivity. This can ensure that a user who forgets to lock their workstation will have it locked by default after a set timeframe, preventing it from a physical attacker at the keyboard.
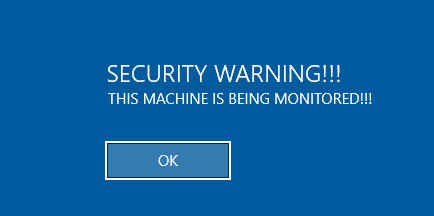
- Interactive logon: Message text for users attempting to log on
- This shows a message for users logging in and is often used to warn a user or give them context over the machine that is about to be accessed.
- Interactive logon: Message title for users attempting to log on
- This is the title that can be placed above the previous message text or standalone as a larger piece of text during a user logon.
- Interactive logon: Prompt user to change password before expiration - 5 to 14 days
- This will warn a user a set number of days before their password expires so a password change can be performed.
After successfully setting these policies, a login screen should require a CTRL+ALT+DELETE combination for logging in, and a custom message will be displayed:
When logging in, no other previous users will be visible and the user name will need to be specified before Zuko can login. This makes an attacker’s life with physical access to a machine more difficult.
Windows Security
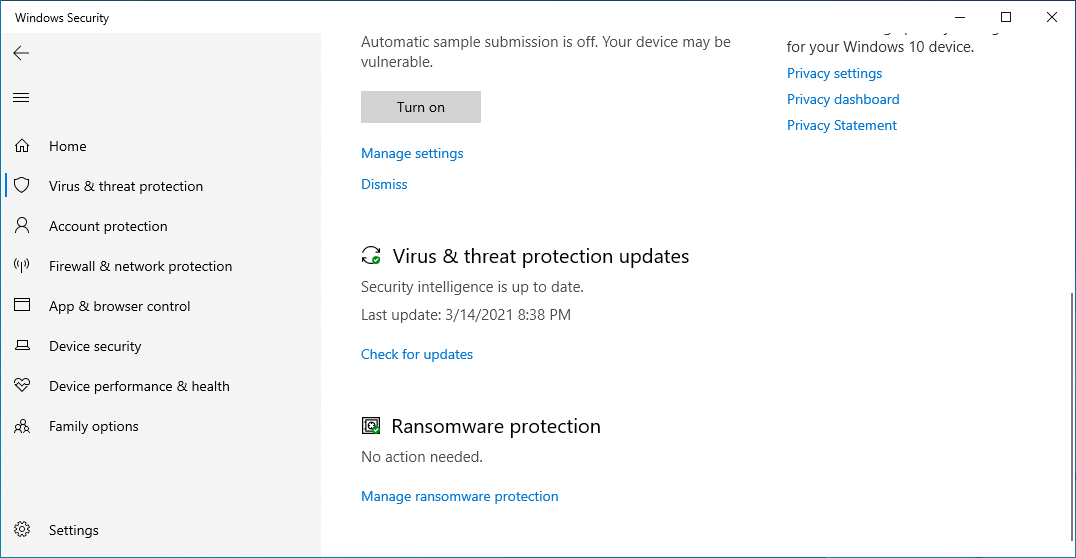
Windows Security is a suite of security tools included with Windows 10 that holds many settings that can assist with system hardening. These built-in features can help prevent malware from running, protect against ransomware, and more. Search for Windows Security in the Windows taskbar and go to Virus & threat protection:
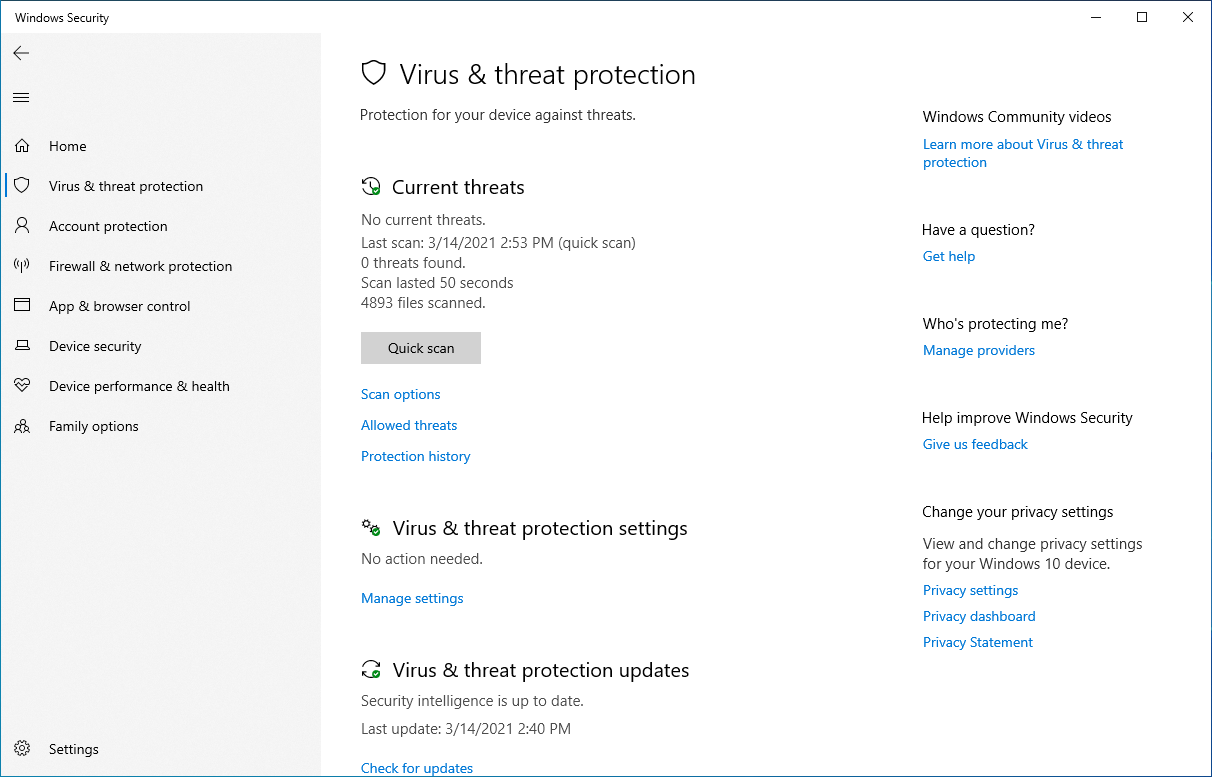
In this menu, scans can be performed against the system. This will scan a number of directories against available virus signatures to try to detect malware on the system. Underneath Virus & threat protection settings, click Manage settings. This has additional configurations for Windows Defender.
In organizations handling sensitive data, the Automatic sample submission setting should be turned off. If Defender recognizes a file as malicious and uploads the file automatically to Microsoft, this could result in unauthorized data disclosure. In order to protect against this, turn this setting off:
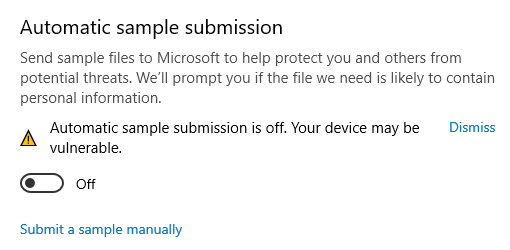
The Submit a sample manually button can still be used to upload a suspect file.
Additionally, the Exclusions option can be configured to add any legitimate software that is detected by Defender:
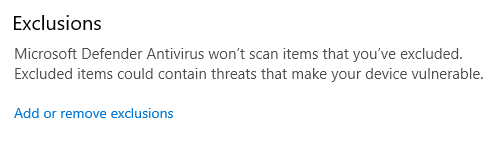
This can be useful for a machine that is used by a penetration tester in an organization or someone handling potentially malicious software. This can also be abused by attackers, however, to add exclusions for malicious software. Click Add or remove exclusions:
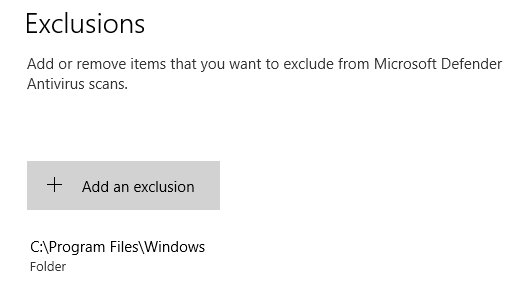
Remove this exclusion and run another quick scan. A threat should be detected:
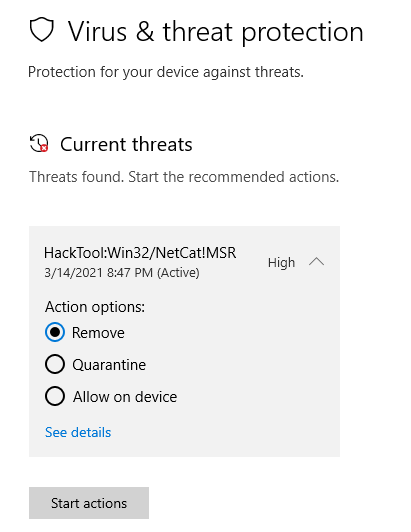
Click Remove and Start actions to remove the malware from the host. This should remove the malicious software from the VM.
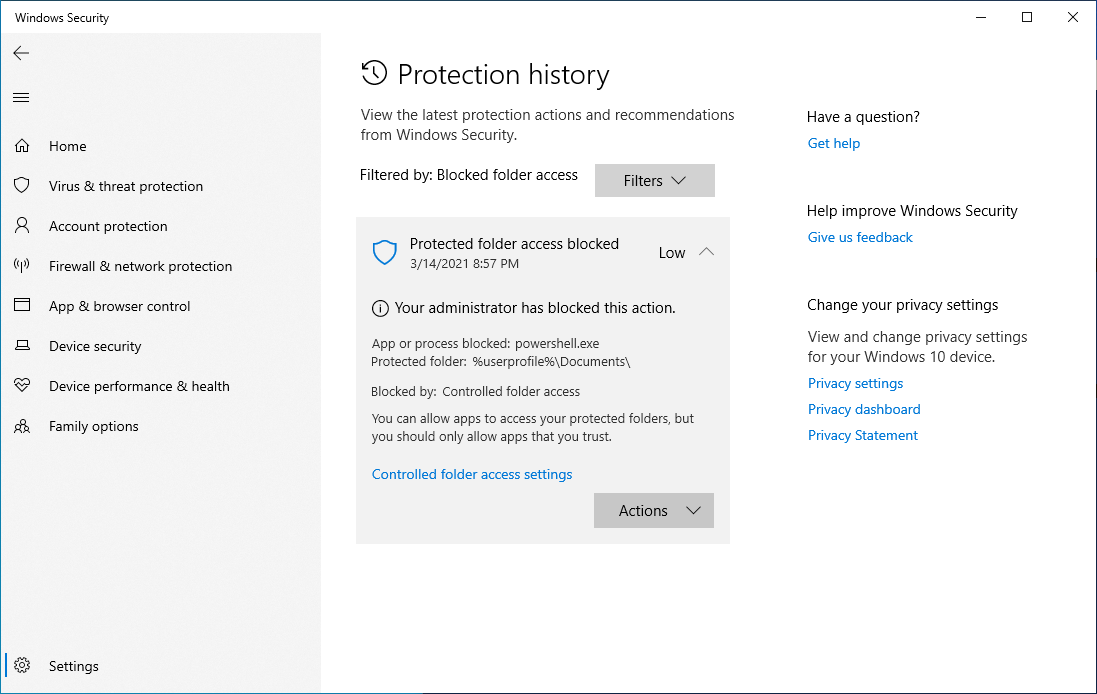
Ransomware protection
Under Virus & threat protection, Microsoft Defender offers Ransomware protection. This is a feature currently only available for Windows 10 Pro:
Click on Controlled folder access, and turn the setting on. By
default, this will stop file access in user directories from many
applications in order to prevent ransomware. For example, PowerShell’s
New-Item commandlet won’t be able to write to Zuko’s Documents folder:
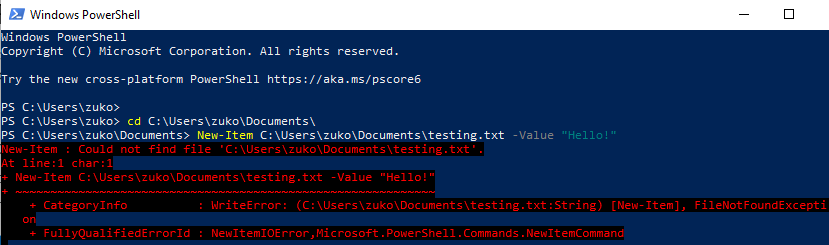
This action will be logged in ransomware protection history in Defender:
This can help prevent ransomware even if an unauthorized program is executed on the victim machine.
Core Isolation
In Windows Security, navigate to Device Security and then click on Core isolation. Memory integrity is one feature that can be turned on to prevent certain processes from tampering with each other:

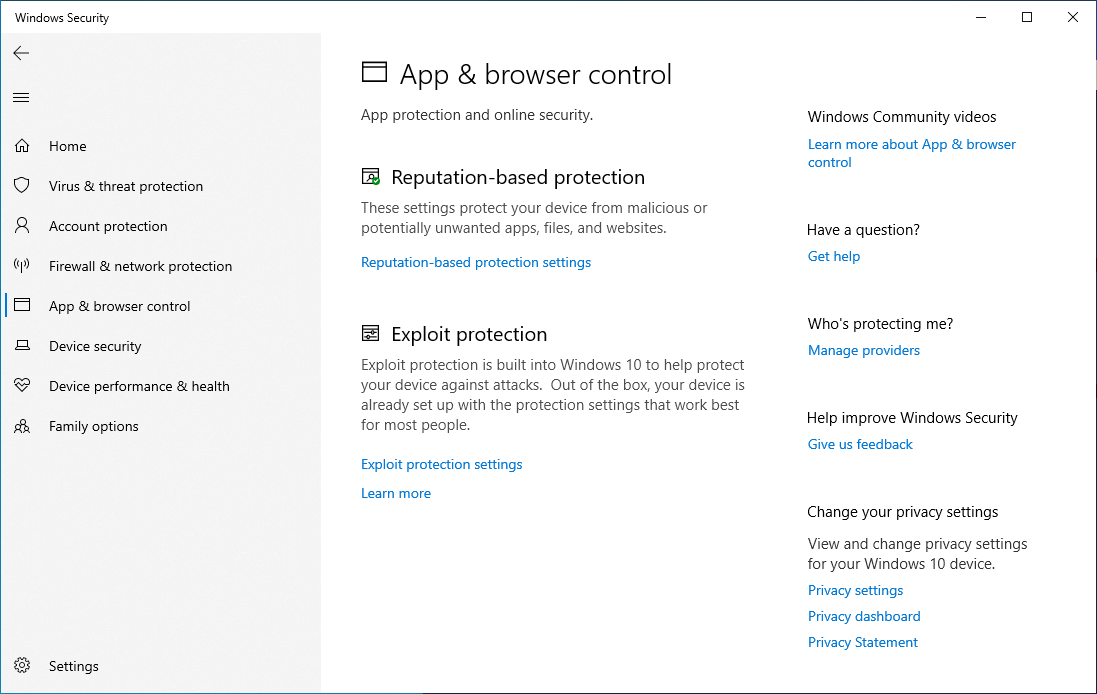
Reputation-based protection
Reputation-based protection is a feature that is built-in to Microsoft Edge that can prevent malicious sites from being accessed. Turn this feature on underneath App & browser control:
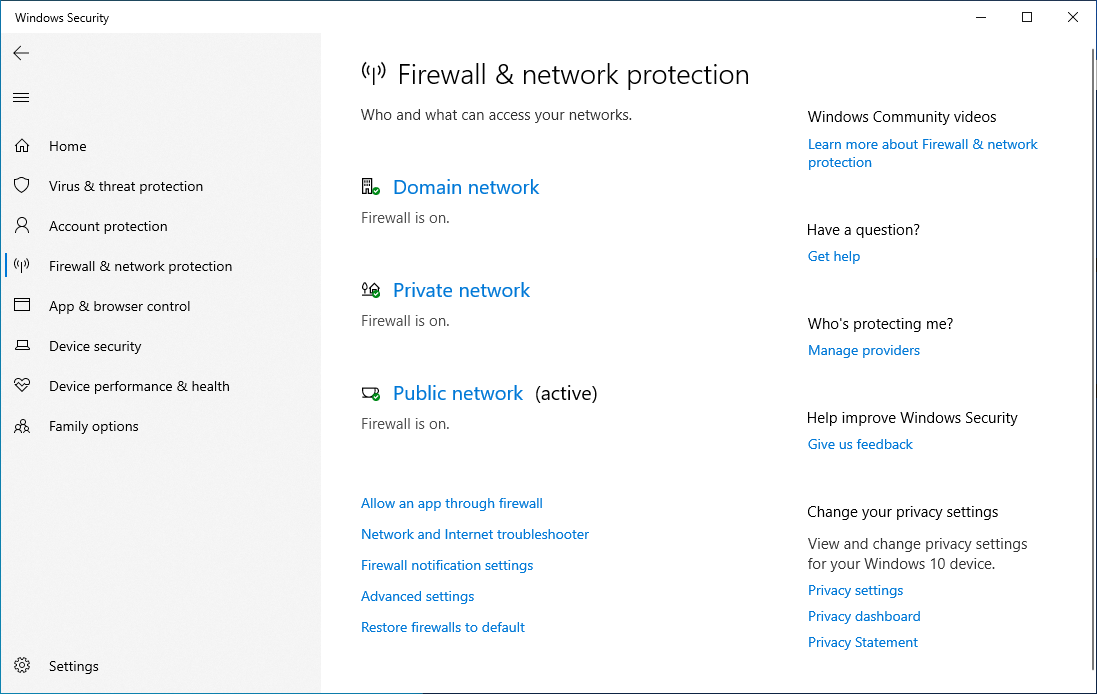
Windows Defender Firewall
The Windows Defender Firewall is a built-in feature that restricts network connections inbound and outbound from a local machine. Default firewall rules often suffice for individual workstations. Underneath Firewall & network protection, ensure that all network profiles are enabled:
A link to Windows Defender Firewall with Advanced Security has been placed on the VM’s desktop. Open this to view all inbound and outbound network traffic rules on the host. Many of these default inbound rules, such as Skype, Xbox, and Cortana are for applications that are not used. Disabling inbound rules can reduce the device’s attack surface over a network. Similarly, outbound rules can also be disabled for any unused apps. Modify these rules to only allow communications for approved applications.
User Account Control
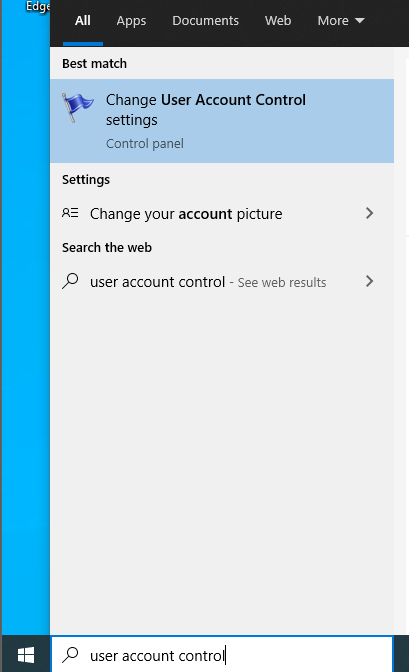
User Account Control (UAC) is a feature in Windows that informs the user prior to administrator privileges being used. When UAC is turned on, opening a program as an administrator will be interrupted with a confirmation message. This step can help interrupt malware from successfully running on a system. To toggle this feature, search for user account control in the Windows taskbar:
There are various settings available to notify the user at different times on a workstation. For most users, the second option from the top should work:
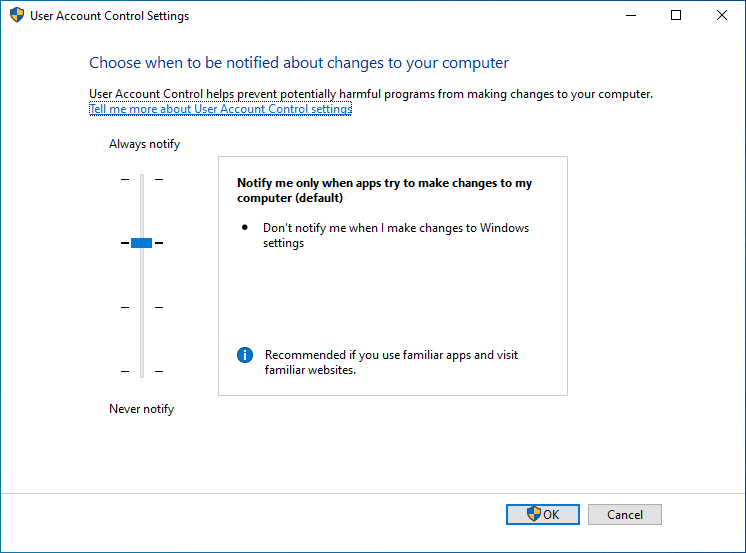
After committing this change, try opening up an administrative PowerShell session. You should now be greeted by User Account Control prompting for confirmation before using administrator privileges:
