Windows 10 Software Auditing Lab
Disclaimer: The enclosed PowerShell script and executable file will introduce vulnerabilities to a system upon execution for training purposes. Do not run this outside of a virtual environment.
Requirements:
- Windows 10 virtual machine (VM) with network connectivity
- Lab 6 PowerShell script archive
Lab Setup:
This lab provides you with a program to run to make a virtual machine vulnerable. Do not run this outside of your virtual machine. This will make the VM susceptible to attack.
When working with the provided script, warnings can be expected from a host machine with anti-malware programs installed. These provided resources deal with the same remote access tools that are often leveraged by threat actors with malicious intent.
Before powering up the VM, take a snapshot of your virtual machine if possible. This will allow you to revert it to a clean slate after completing the lab, allowing you to reuse the same machine after this lab.
Windows 10 Setup:
This lab requires a Windows 10 workstation virtual machine.
PowerShell Script Steps:
Extract the lab archive inside your Windows VM. This can either be done by downloading the file inside the Virtual Machine or using VMware tools or VirtualBox shared folders to move files between your host and virtual machine.
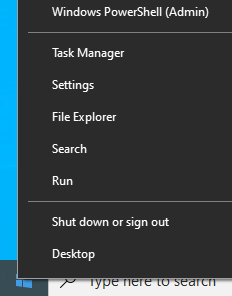
Open PowerShell as an administrator. This can be done by right clicking on the Windows icon in the bottom left corner and clicking Windows PowerShell (Admin):
Change directories to the folder containing the PowerShell script.. This will vary depending on the location of the file and the username on the Virtual Machine. Set the execution policy to allow the script to run, and execute it with the dot-backslash command:

This script will install a variety of software on the virtual machine for purposes of the lab; it is recommended to run this on a virtual machine with a speedy internet connection for best performance. Expect slower internet speeds to take longer for script completion. The
Note: This PowerShell script is not intended to be reverse engineered to find vulnerabilities on the system, but rather emulate an authentic vulnerable environment that was caused by other means. This script can be removed from the virtual machine after running to completion.
User Accounts
For this lab, this workstation belongs to one user:
- Sheldon - Local User
- Username:
sheldon - Password:
B0nes!
- Username:
- Stanley - Local Administrator
- Username:
stanley - Password:
Wh0ishere!
- Username:
In this environment, Sheldon is a local user, and Stanley is the local administrator. This lab will focus on auditing unnecessary software and examining different vulnerabilities and reducing the attack surface of a Windows 10 machine.
Background
In any organization’s environment, the principle of least privilege (PLP) guides system administrators to secure a network and reduce the possibility of compromise. This usually focuses on making sure higher privileges are only given to those that need it. For example, an executive officer will often never need to be a domain administrator on a network, and average users often don’t need local administrator access on a corporate computer. While not the same as PLP, unknown software installation can pose similar challenges to a system administrator.
User-installed software can be risky for an organization’s network with risks of malware installation or weakening security measures by giving attackers new means to access an endpoint. To try to reduce the attack surface of a machine, services and software must often be audited and removed. Windows 10 has some built-in features that enable administrators to reduce unattended software installation.
Sheldon is a user who has privileges to install software, and Stanley’s account will be used to examine this machine and audit installed programs. Login using Stanley’s account shown above.
Application Auditing
In this environment, Sheldon is a user who needs access to email and the ability to edit and create spreadsheets, documents, and slideshows presentations. His company uses Skype for internal communication, Thunderbird for email, LibreOffice for document editing, and Firefox, Chrome, and Edge to browse the internet. In this network, all user workstations are running Windows 10 and using built-in Windows Defender features for antivirus protection.
Using Stanley’s account listed above, login to the VM and explore software installed on the machine.
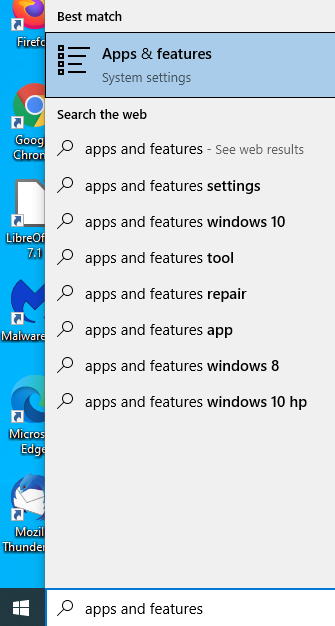
In Windows 10, the currently installed applications on a computer can be found using the Apps & Features menu found within settings:
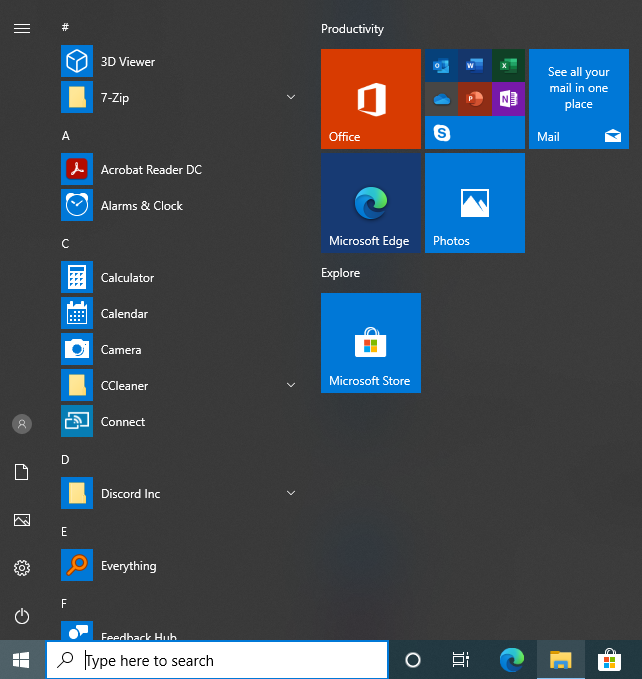
Additionally, many programs are linked to the Windows Start menu when they are installed. Click the Windows icon to bring up the bar or use the Windows key on your keyboard to bring up the Start Menu:
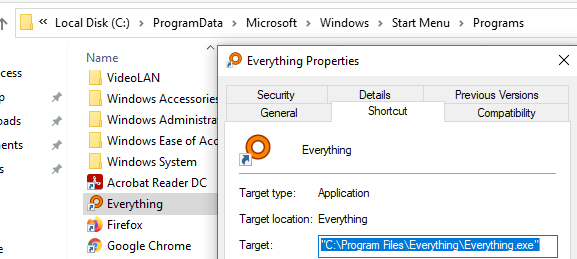
To view the actual location where a program is installed, right click on an entry in the Windows Start menu and browse to the file location:
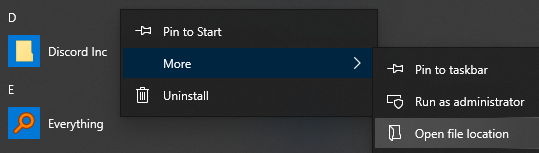
While Start Menu entries will usually point to a shortcut file, right click and open file properties to see where the actual .exe file is located:
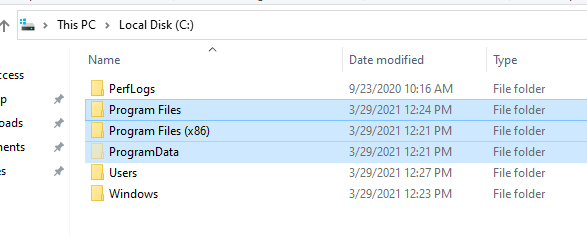
While not all applications must be installed in the below locations,
most standard software installations will be located in Program Files,
Program Files (x86), or ProgramData:
While manual removal of files can be helpful in removing software from Windows, applications often provide uninstallers that can help remove the software from a system.
Acceptable Use Policies
Acceptable use policies define what is and is not an acceptable use of an organization’s computing resources. For example, many real-world companies will prohibit users from installing games or accessing social media from a company-owned device. While every organization’s acceptable use policy will be different, these policies generally exist to reduce corporate computers from being used for non-work related activities. This can go hand-in-hand with security policies that aim to reduce the possibilities of attack against an organization. If a user wants to run a web server on their work computer, for example, attackers may target this server and attempt to upload a webshell to start an attack.
With an acceptable use policy in place prohibiting personal use of a work computer, installing a personal web server on a company laptop would not be allowed. While a policy in itself will not directly stop a user from performing unauthorized activity, in the event of an attack a user can be held responsible for the violation. Windows 10 has some built-in features to help align acceptable use policies with actual controls to prevent violations and strengthen a machine’s security posture.
Using the methods shown above, identify any installed programs that may not be necessary for Sheldon to complete his day-to-day work.
After searching through the software on the system, you should have identified the following unnecessary pieces of software:
- CCleaner
- Unneeded software used to clean files from a workstation
- Discord
- Unneeded communications software that doesn’t have a business use
- Everything
- Searching software that doesn’t have a business use
- FileZilla Client
- FTP client that doesn’t have a use for Sheldon’s job
- Git
- Version control software that doesn’t have a use for Sheldon’s job
- Malwarebytes
- Unneeded antivirus software, organization uses Windows Defender instead
- Notepad++
- Unneeded text editing tool that doesn’t need to be used for Sheldon’s job
- PuTTY
- Sheldon does not need to use SSH for his job
- TeamViewer
- Unneeded remote access tool that could allow Sheldon’s computer to be accessed by another computer
- Trojan Remover
- Unneeded virus removal tool, Windows Defender serves this purpose
- VLC media player
- Unneeded media player, Sheldon doesn’t this application for this job
- Wireshark
- Network traffic capture tool not needed for Sheldon’s job
Often, small organizations will create a “golden” image with standard pieces of software that can be installed across all workstations across an enterprise. This can inadvertently introduce risk by having software used for system administration installed across regular user workstations that shouldn’t have administrative privileges.
Uninstalling Software
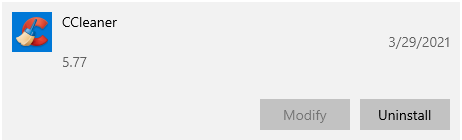
To remove software from the system, highlight an entry and click Uninstall:
In addition to the unneeded pieces of software identified previously, other software installed by default on Windows could also be removed in this way. Some unnecessary software could include Xbox components, OneDrive, and 3D Viewer.
This can also be performed by going into the Windows Start Menu, right clicking items, and selecting Uninstall. Some utilities will not be present in Apps and Features and will need to be uninstalled in this way.
Windows Optional Features
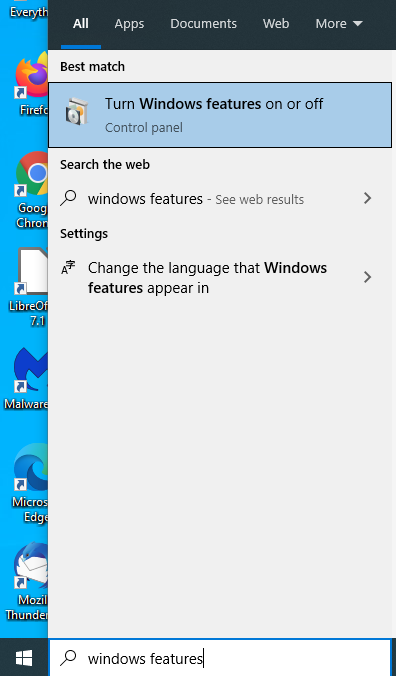
Windows categorizes built-in optional features as another category in system settings. These are also additional pieces of software that can be installed on top of Windows. To browse optional features that are installed on Sheldon’s machine, you can search for Windows Features within Control Panel in the Windows Start Menu:
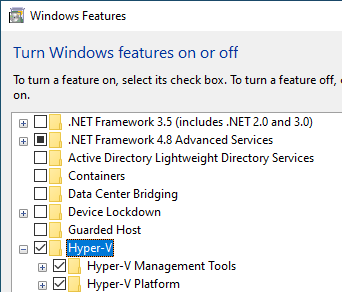
Within this menu, Hyper-V is turned on. Hyper-V is a Windows feature that can be used to run virtual machines similar to VMware or Virtualbox. Sheldon doesn’t need to use Virtual Machines for his job, so this feature can be turned off. Uncheck the box and click OK to uninstall Hyper-V. This may take some time to uninstall and will require a reboot to complete successfully.
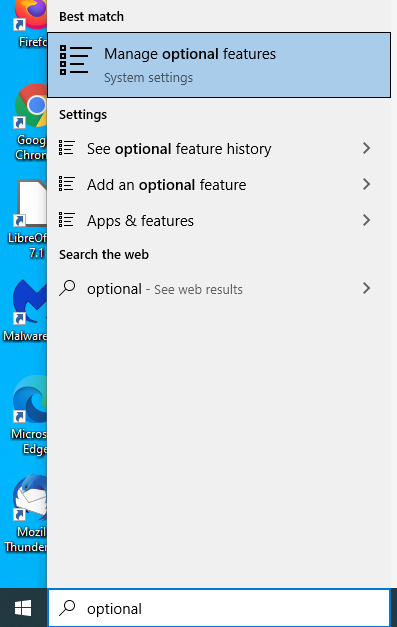
Similar to the previous method, there is a separate similar settings page in Windows 10 for optional features that can be accessed via a search in the Windows Start Menu:
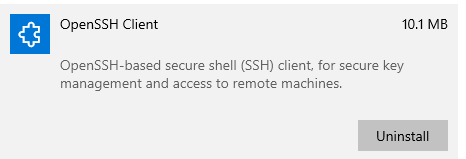
After scrolling through these features, you should see OpenSSH Client and Server, and RSAT: Server Manager:

OpenSSH is a set of features that can be added to Windows to enable SSH server functionality, and RSAT: Server Manager can be used to remotely manage Windows Server installations. Running an SSH server on a workstation can also give attackers another avenue to attack and remotely access the workstation. As Sheldon again doesn’t need any of these features to do his job, these can all be removed. Click on each unneeded feature entry identified above and click Uninstall:
AppLocker
Note: AppLocker is only available on certain Windows platforms. Check this Microsoft guide to ensure that AppLocker can run on your system.
System administrators have multiple ways to help prevent users from installing unnecessary software, even when users in an organization are local administrators. A powerful built-in Windows feature that can accomplish this task is AppLocker. To configure AppLocker settings on this local machine, open the Local Security Policy editor by searching for it in the Windows Start Menu:
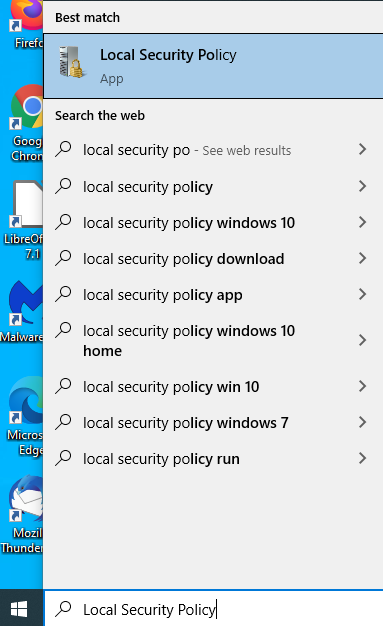
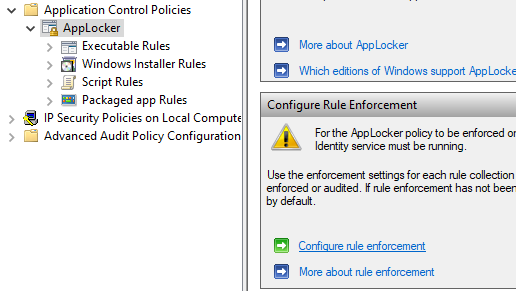
Within the Local Security Policy Editor, expand AppLocker:
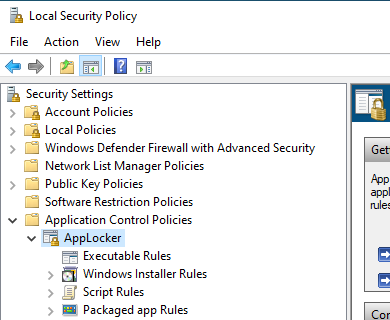
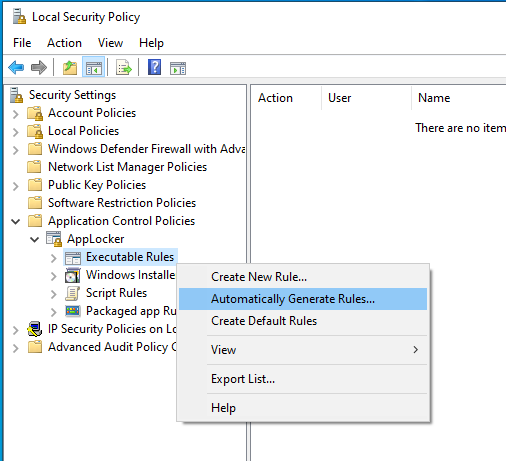
Within this editor, AppLocker can be configured to allow or block certain executables from running on the computer. In larger organizations, rules can be crafted and deployed at scale to suit the needs of various groups of people. For example, a set of rules can be configured to allow editing software for marketing employees, but different sets of rules for sales software for the sales department. While this can be deployed via Active Directory, AppLocker rules can be set up from a known good baseline like the one that was just created by removing unneeded software. Right click on Executable Rules and click Automatically Generate Rules:
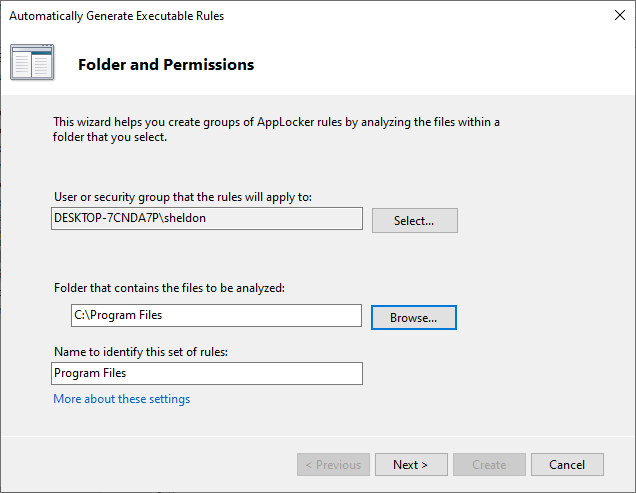
This will scan various folders to make rules for applications on the
system. Start by running this tool against Program Files and setting
the security group for sheldon to apply these rules against:
On the next prompt, default options will suffice for this case. By default, AppLocker will look towards the application publisher and digital signature of executables to make determinations. If this is not available, a file hash will be used to identify a file.
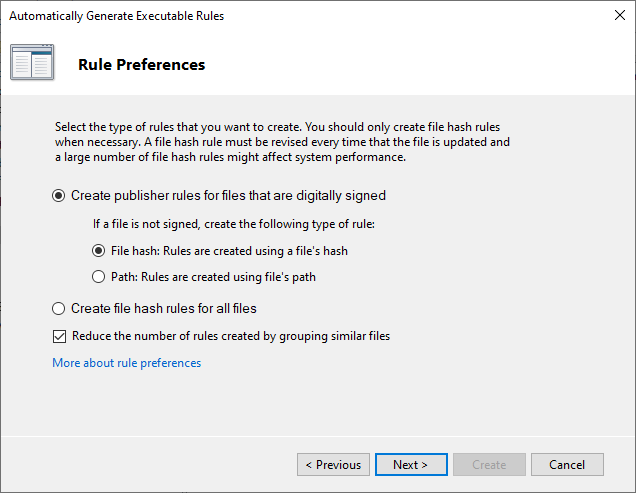
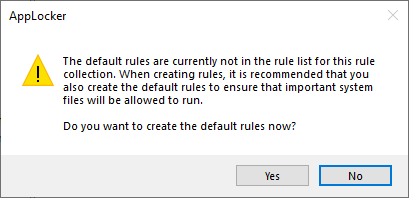
Click Next and allow some time for the rules to generate. After generation, a summary of rules created will be displayed. After finishing the process, allow the creation of default rules when prompted:
Repeat this process against the directories Program Files (x86) and
ProgramData to make sure rules are configured against all popular
locations for software on the system.
To enforce the rules that were just created, go back to the main AppLocker pane, and select Configure rule enforcement in the right pane:
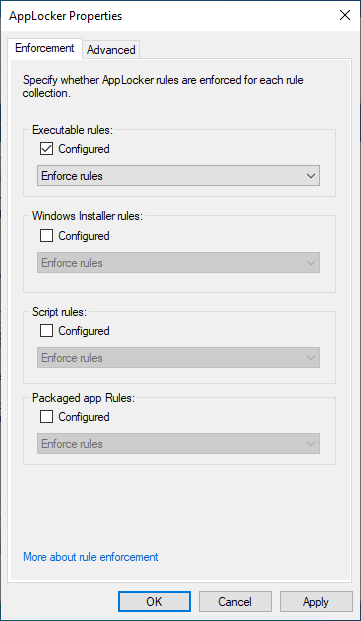
Check the Configured box for Executable rules and select Enforce rules:
Before AppLocker can run properly, the Application Identity service needs to be enabled and started in Windows. This must be done via an elevated command prompt. Open this via searching for cmd.exe in the Windows Start Menu, then right-clicking Command Prompt.
Type the following command into the command prompt to configure the service to automatically start:
sc.exe config appidsvc start= auto
Restart the computer to start the service.
When new programs are executed that don’t match digital signatures or hashes of previously run programs, they will automatically be blocked by AppLocker before they are run.